This is the second of three posts about how to upgrade your WLtoys 1:18 RTR RC cars cleverly, without a waste of money, and thus getting the best out of your purchase. Please remember that this post assumes you have completed upgrade path 1.
In this YouTube video (my first!) I do test Ovonic 3s batteries with 120A JLB Cheetah and the brushless 60A WLtoys A979B from this post! Supporting me through Subscribe and Like would be amazing for me!
Part 2: going brushless, describes the most important steps that will turn your WLtoys 1:18 car into a rocket. After you have completed these steps, the most important point, if you can’t referain on the ESC+motor choice, will be how to keep your RC car on the ground!
This post’s topics are the following:
8) radio transmitter and receiver with gyro (dependency for 9,10,11)
9) brushless ESC with programming card (45A+ if you want to go 3s)
10) brushless sensorless 4 poles motor (2838 or bigger)
11) digital metal gear servo (trust me, you want it)
12) full metal drive line (stock gears will last minutes otherwise)
13) stock chassis mod for battery room (bigger 2s, or 3s)
14) better Lipo or even 3s (taking off…)
8) radio transmitter and receiver with gyro (dependency for 9,10,11)
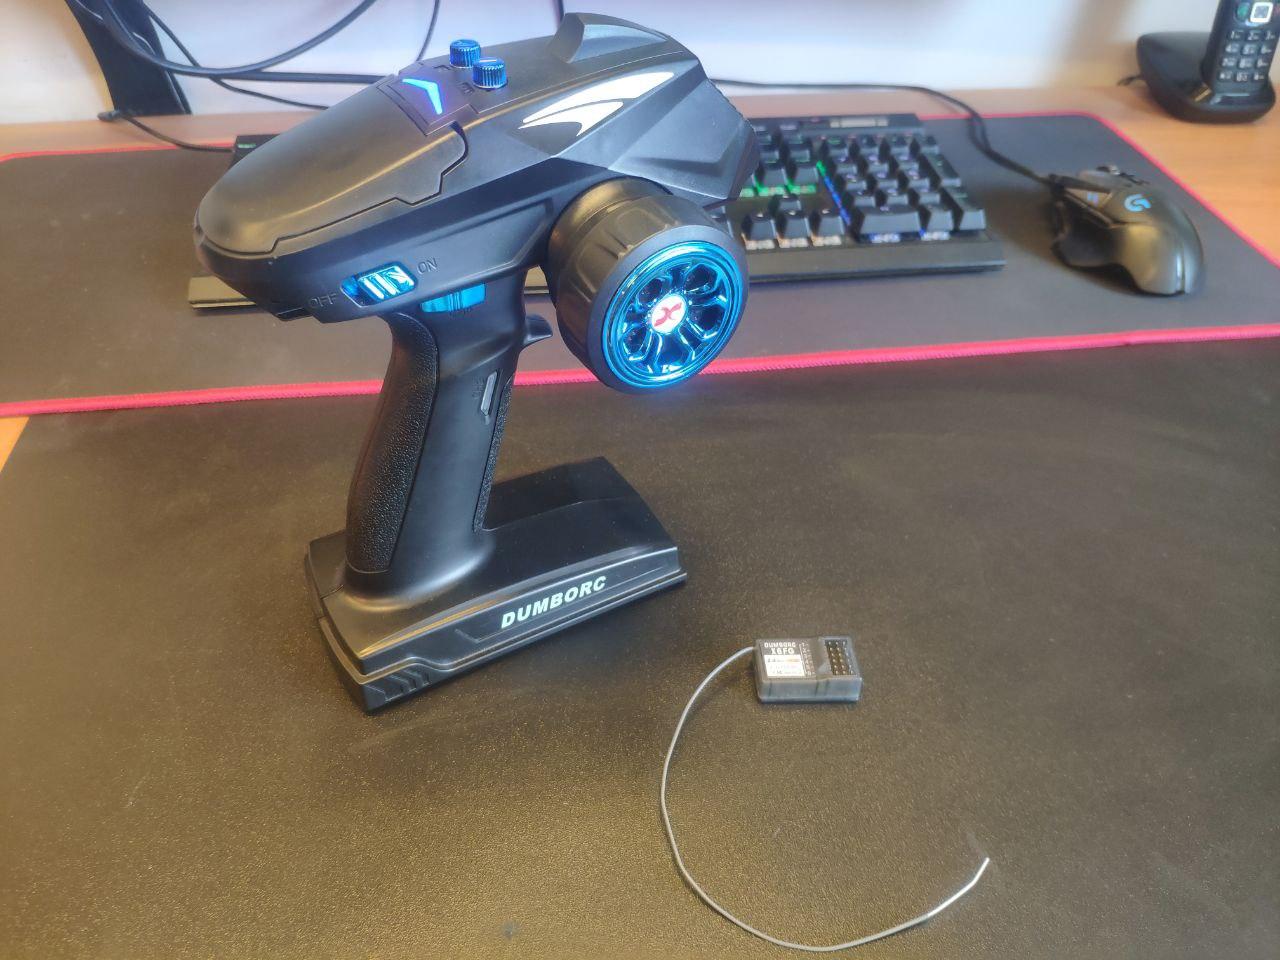
One thing that could really be improved in WLtoys A959 A969 A979 A959B A979B 1:18 RTR RC cars is the transmitter. Stock is quite big, sharpy and it’s not only awful but laggy too. Indeed I use to race WLtoys 1:18s with the stock transmitter of another RC car I love: Amewi Sandstorm 22264. It ships with the same transmitter as WLtoys 144001 that is much better than stock for both range and lag. By the way, nothing you can compare with a good quality transmitter. Here I used a good but cheap one, the DumboRC X6 transmitter with X6FG receiver. I won’t get too much into details, because this device deserves a series of vids or posts, if not a whole website. Just ensure you go for a device that provides a minimum of ~250mt range with no lag if you expect to run 100KM/h or so. When an overpowered RC car transmitter lags, it’s likely that you will put too much throttle and it flips on the roof. And it’s not fun to have your little RC car flipped like a turtle 300 meters away from you!
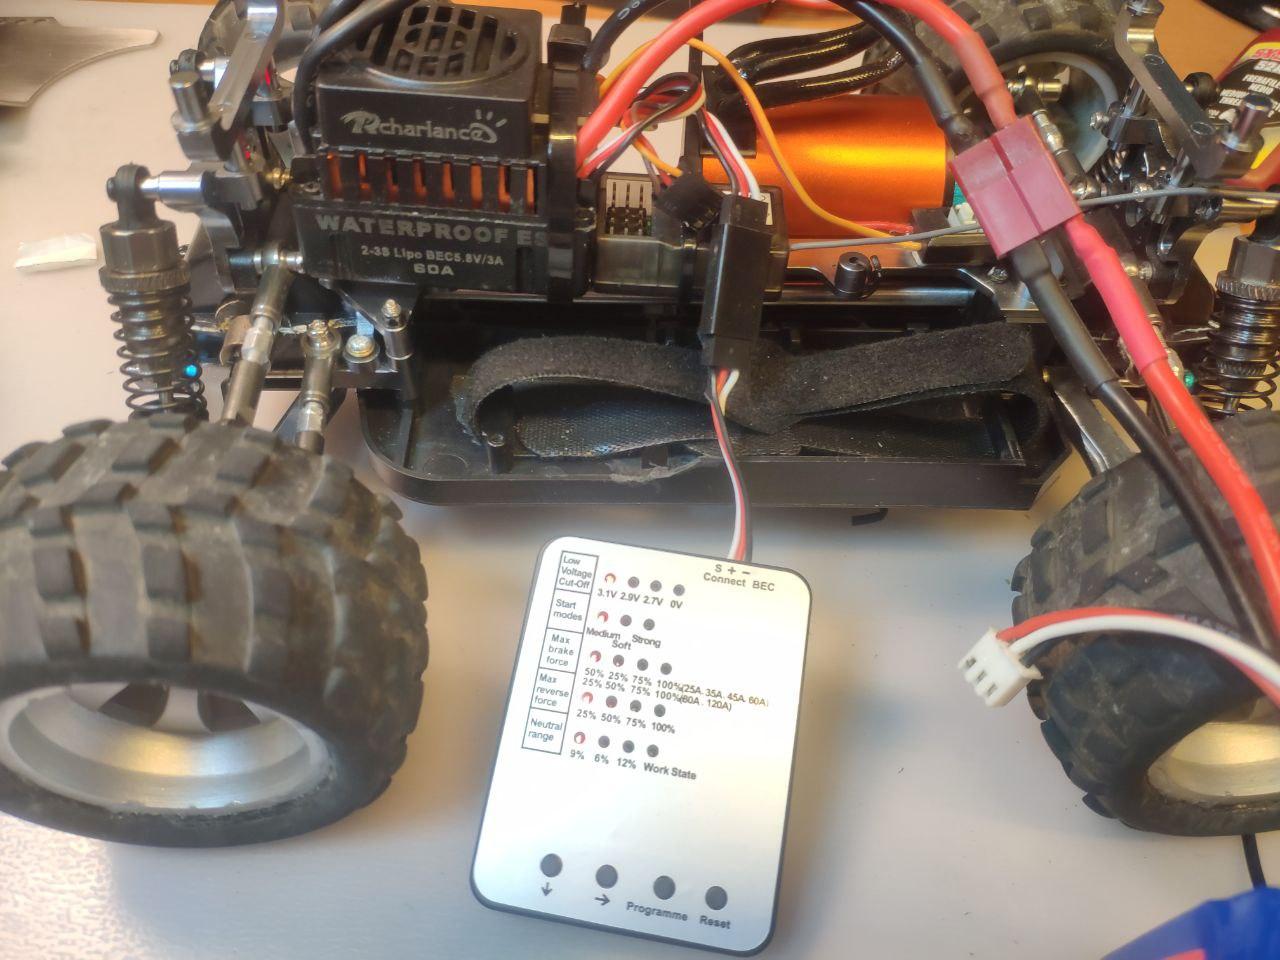
9) brushless ESC with programming card (45A+ if you want to go 3s)
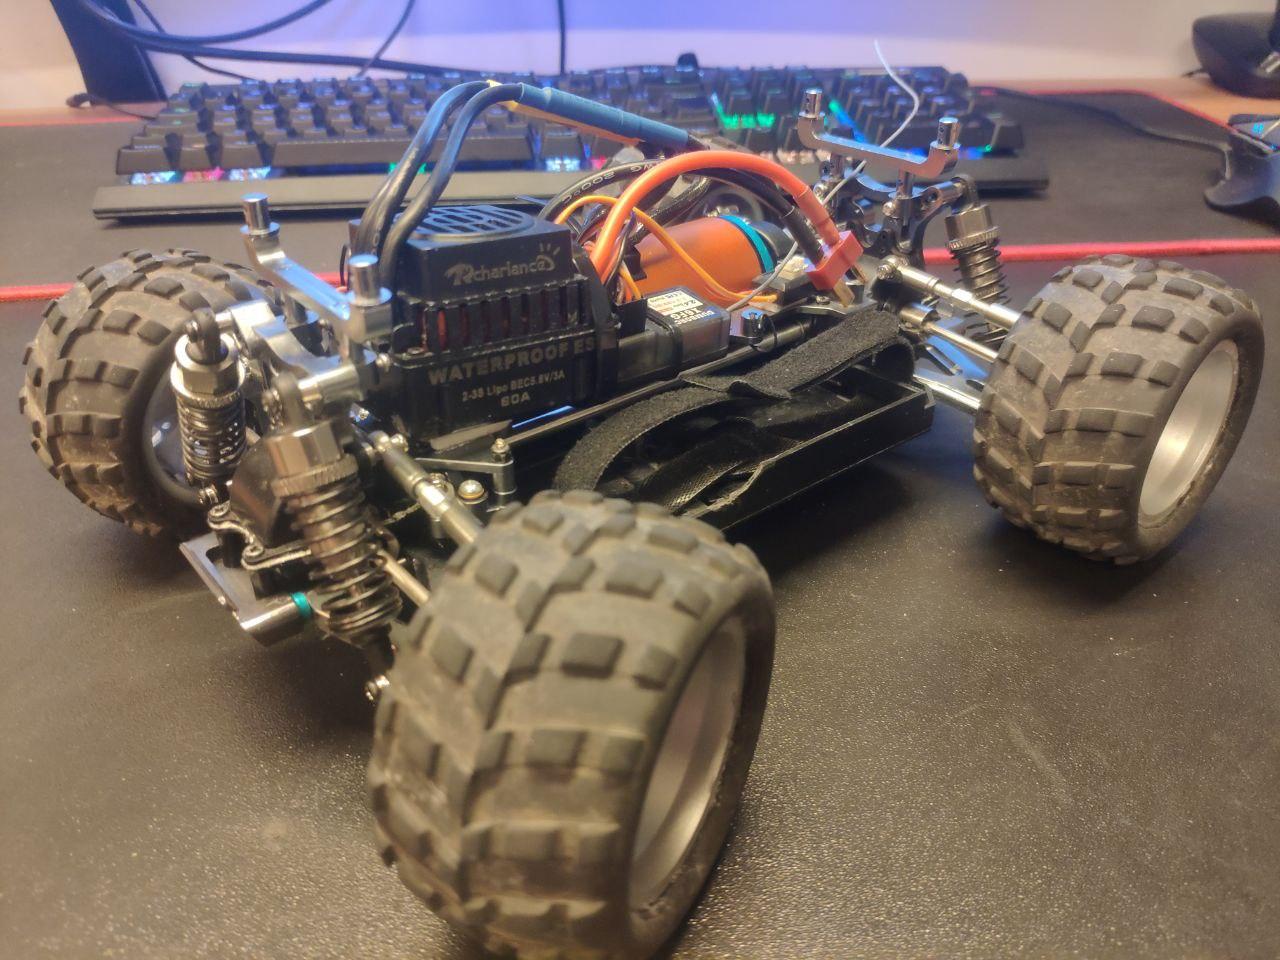
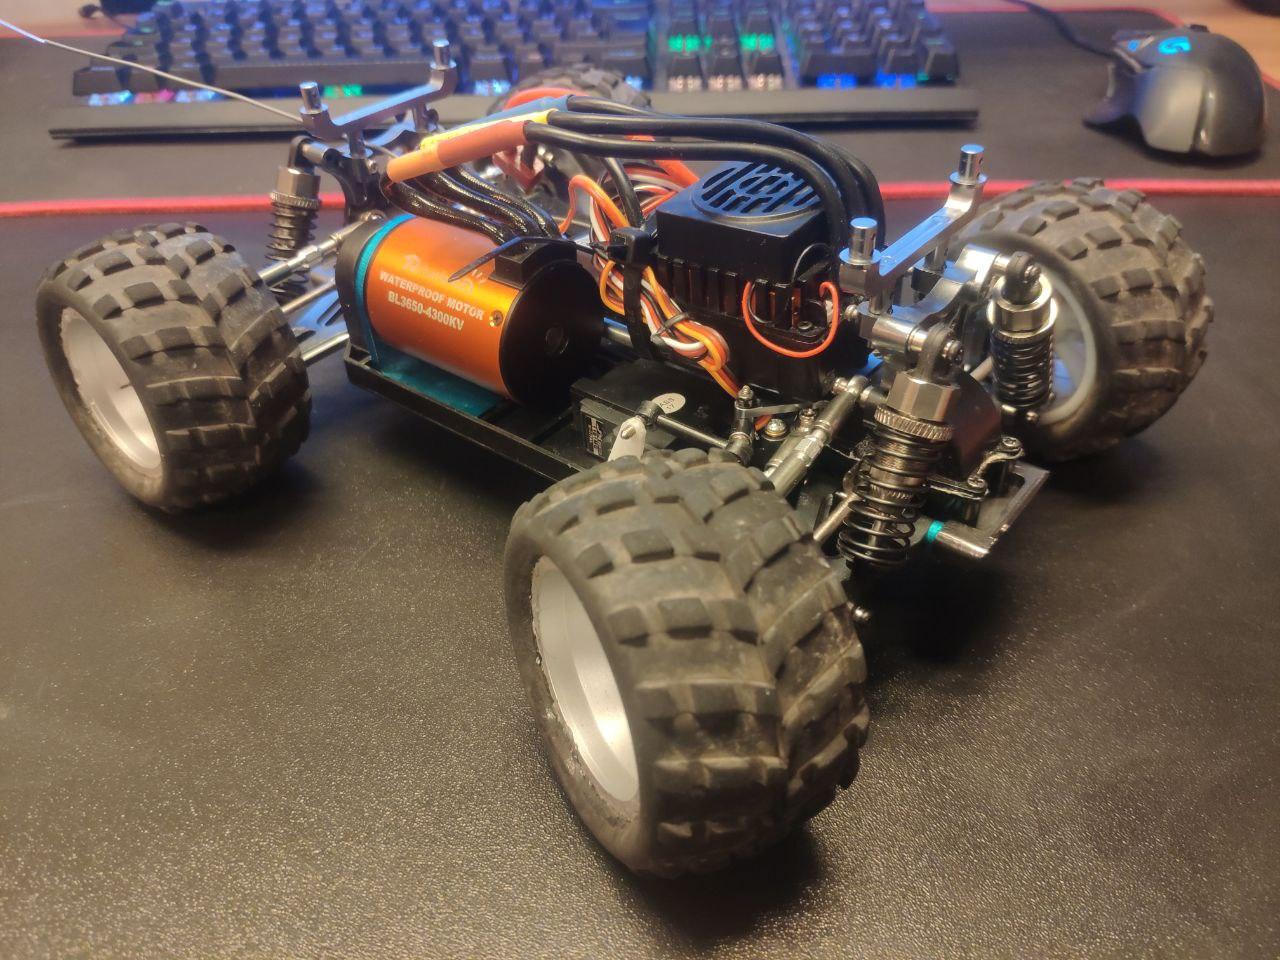
Once we get to ESC’s Amps, we really quit the cheap stuff and start doing seriously. For the model you see in the pics I spent more or less the same money spent for the car, just for the upgraded motor + ESC + programming card. Avoid a 35A ESC if you mean to ever try 3s, you risk FIRE. Regarding the A979, I went for a 60A one. I think the craziest modder around may consider it more than enough for a 600grams car. Maybe it could do 200KM/h with proper gearing, if you can manage to keep it on the ground. Regarding the A959, big issue: nothing bigger than a 45A will fit under the tiny body. You will have to choose if you want to cut a huge window in the car’s lexan, or just use a smaller ESC. I also saw a guy on YT that removed the cooling fan away from the 60A ESC in order to fit it hunder the A959’s hood. I would not recommend such. The only case where I would suggest an ESC smaller than 45A is for the A949, it is a completely different car and upgrade path, indeed.
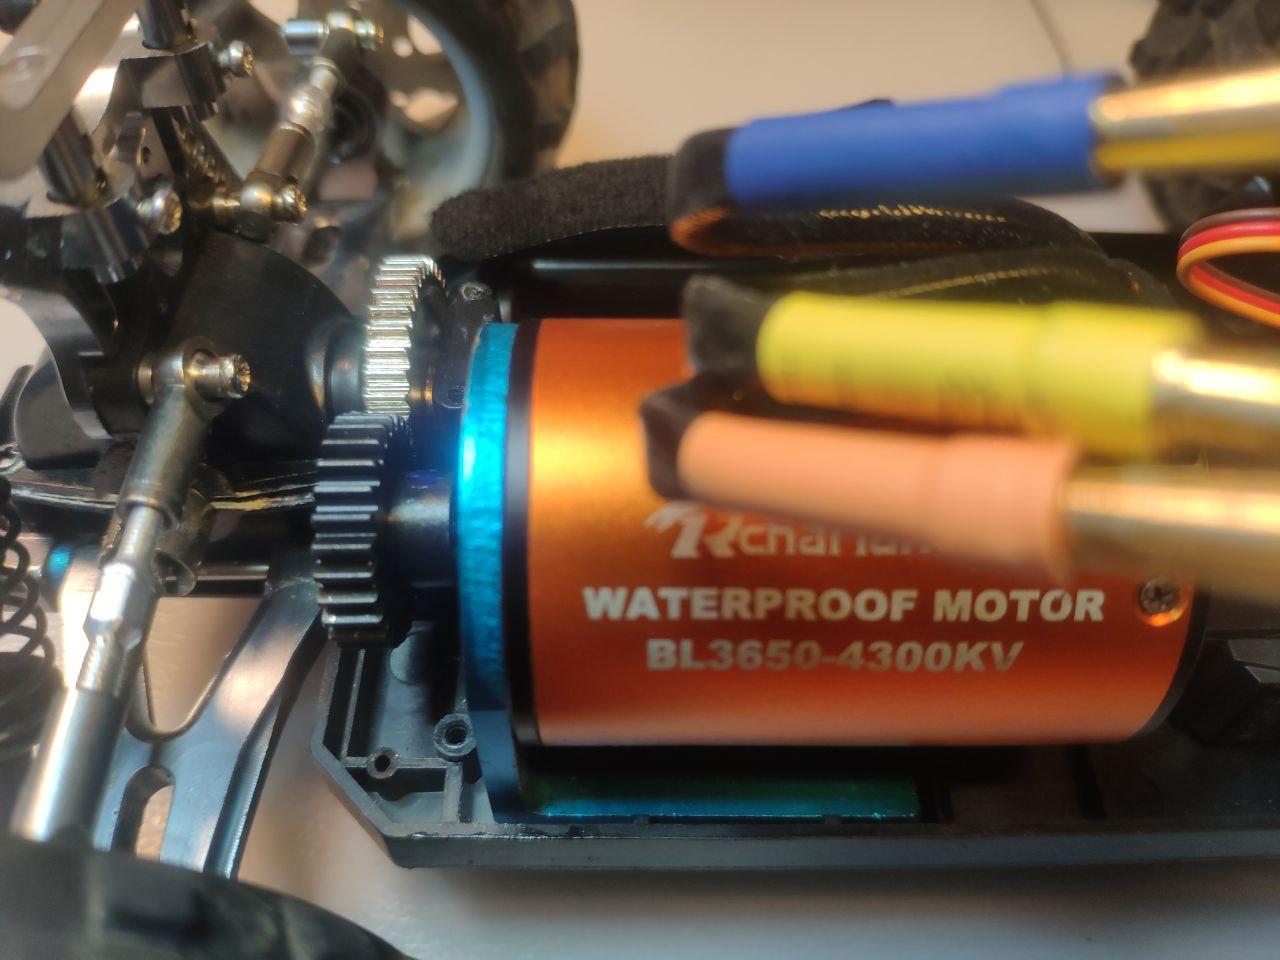
10) brushless sensorless 4 poles motor (2838 or bigger)
I would suggest you to think about the durability of your RC car here. You don’t necessary need to buy a motor+ESC combo. Best choices are for separate products. In the preview vid of this post you see the tyres of my A979B spinning at around 30000RPM on the stock 2s. Now you should ask yourself: What do you want to do with your car? A record breaking run for the taste of having the fastest small RC car of your Town, or you want to keep on having fun every weekend with it? If you want it to last for months or possibly years, try to not exceed with the motor you choose. I bought this 3650 for testing, but I doubt I would do more than a few runs with it on a 1:18. I think that most of the RC fun comes from keeping control, and this way it’s obviously not possible! Actually, I may use this motor later on for conversion of a vintage 1:10 27MHz Nitro from the 90’s. A 2845 will be more than enough for such small 1:18 RCs.
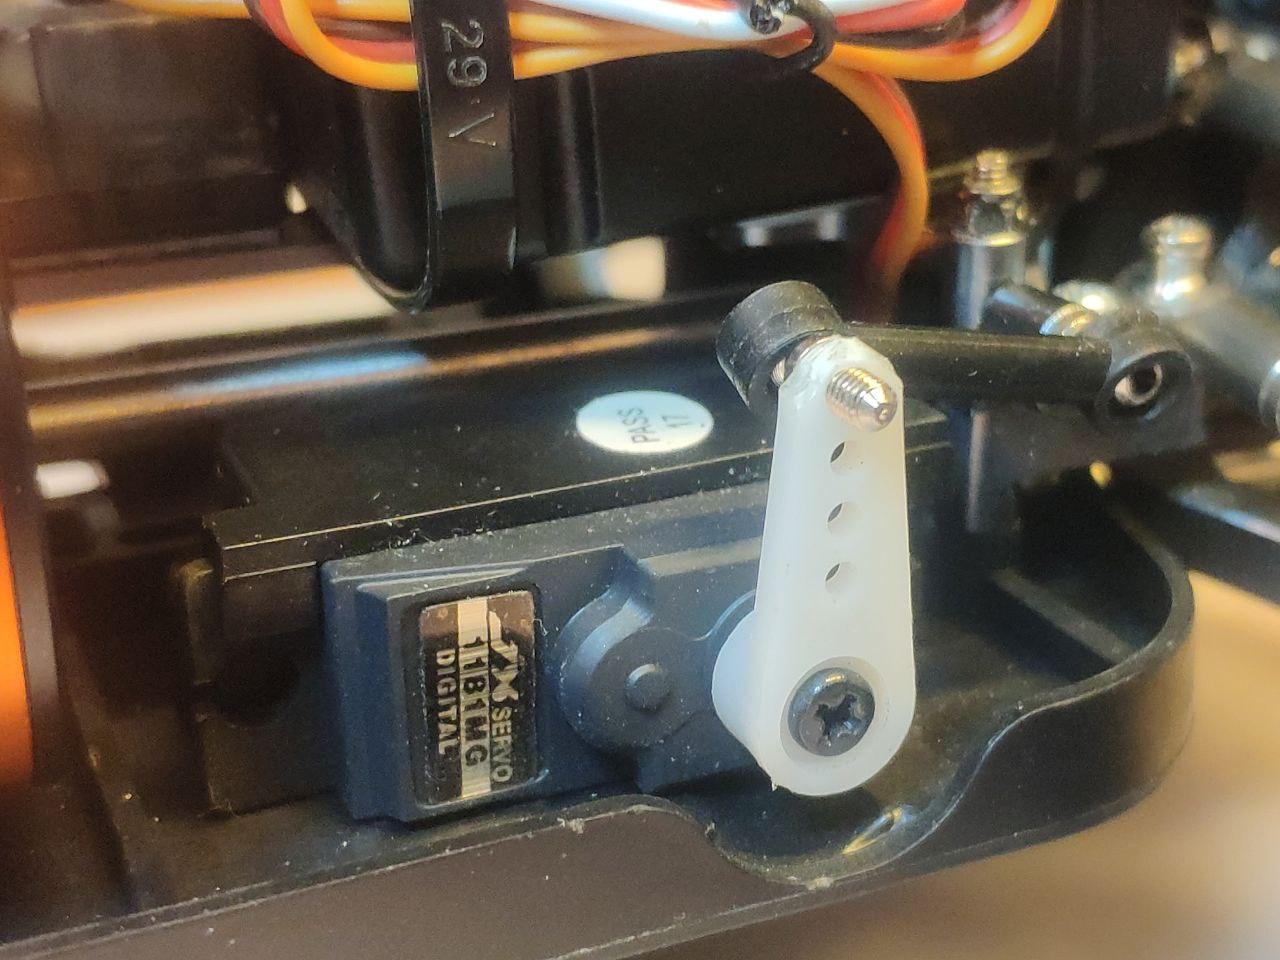
11) digital metal gear servo (trust me, you want it)
Hey, I heard about keeping control. How about a quick, affordable, progressive, precise, and powerful motor to direct your tyres? If you never tried a serious RC car you don’t know the difference that a good servo can make. It can simply turn your RC car in what you always desired it to be. There is not much that can be said, you should just try the difference between one of those stock plastic servos and a digital metal gear one. For my WLtoys 1:18 RC cars I use the JX Digital Servo 17g model PDI-1181MG. Remember that this component is a dependency for 8/9/10. Once you change one of those, you loose compatibility for each. Stock 5 wires servo just can’t be attached to any aftermarket receiver.
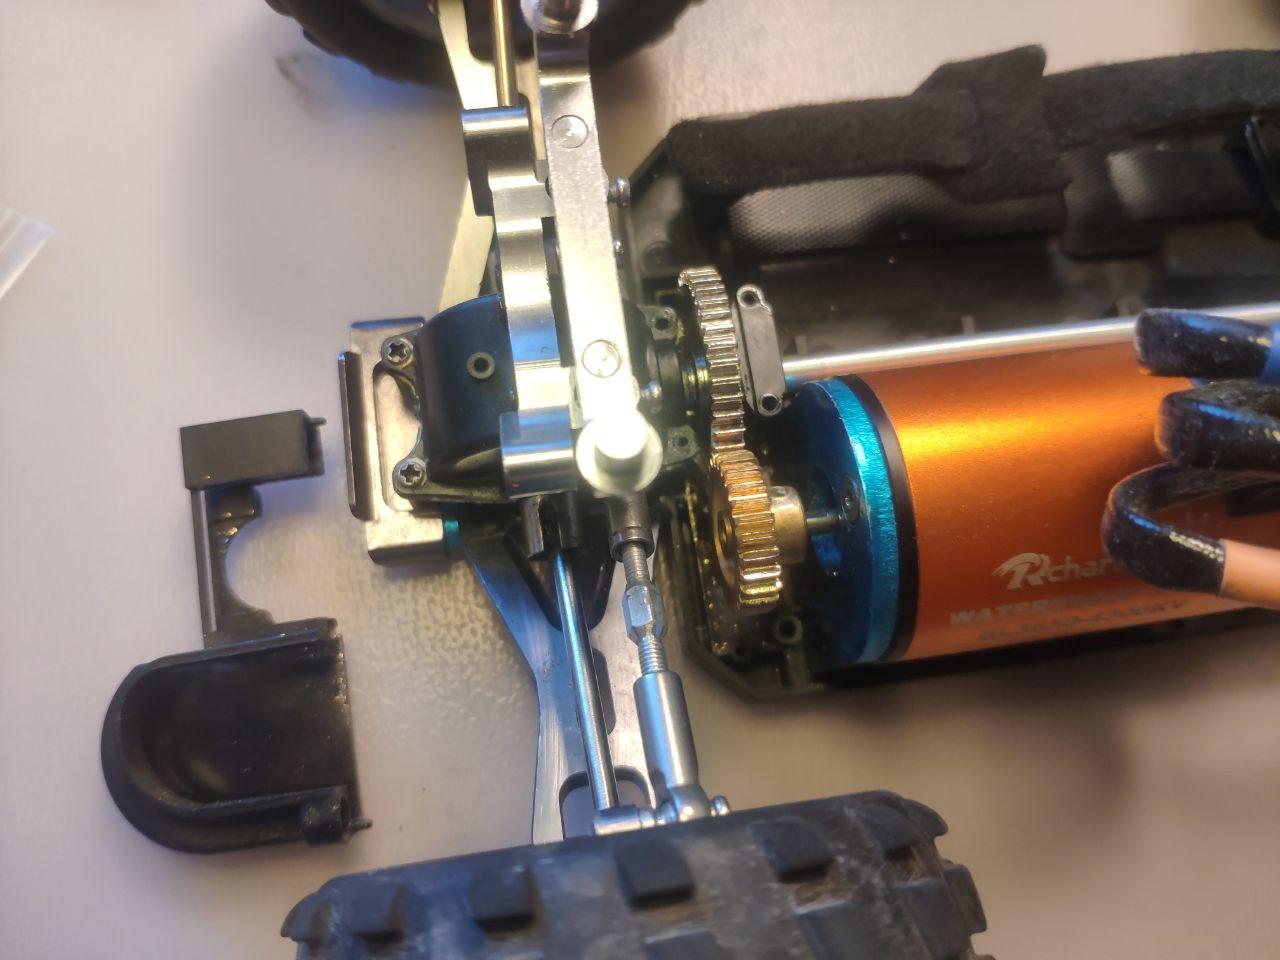
12) full metal drive line (stock gears will last minutes otherwise)
Here a specification is due. The stock metal pinion is barely better than plastic. You can pair it with the stock plastic 42T reduction gear and use it with the 540 stock brushed motor. But it’s just not made of a strong enough metal to hold with the power/RPMs of a brushless motor and the friction with an upgraded 42T steel reduction gear. As you can see in the picture down here it won’t last for long, spreading a golden powder all over the gear’s protection cap. The motor pinion must be steel as well. I prefer the silver ones over the blacks, but 17T steel silver pinions seems rare. I would also suggest you to think about overgearing. You can find plenty of motor pinions and reduction gears if you are not satisfied with such 17/42T. There is a Bible of gearing, do you know? Here it is, thanks to Roger’s Hobby Shop!
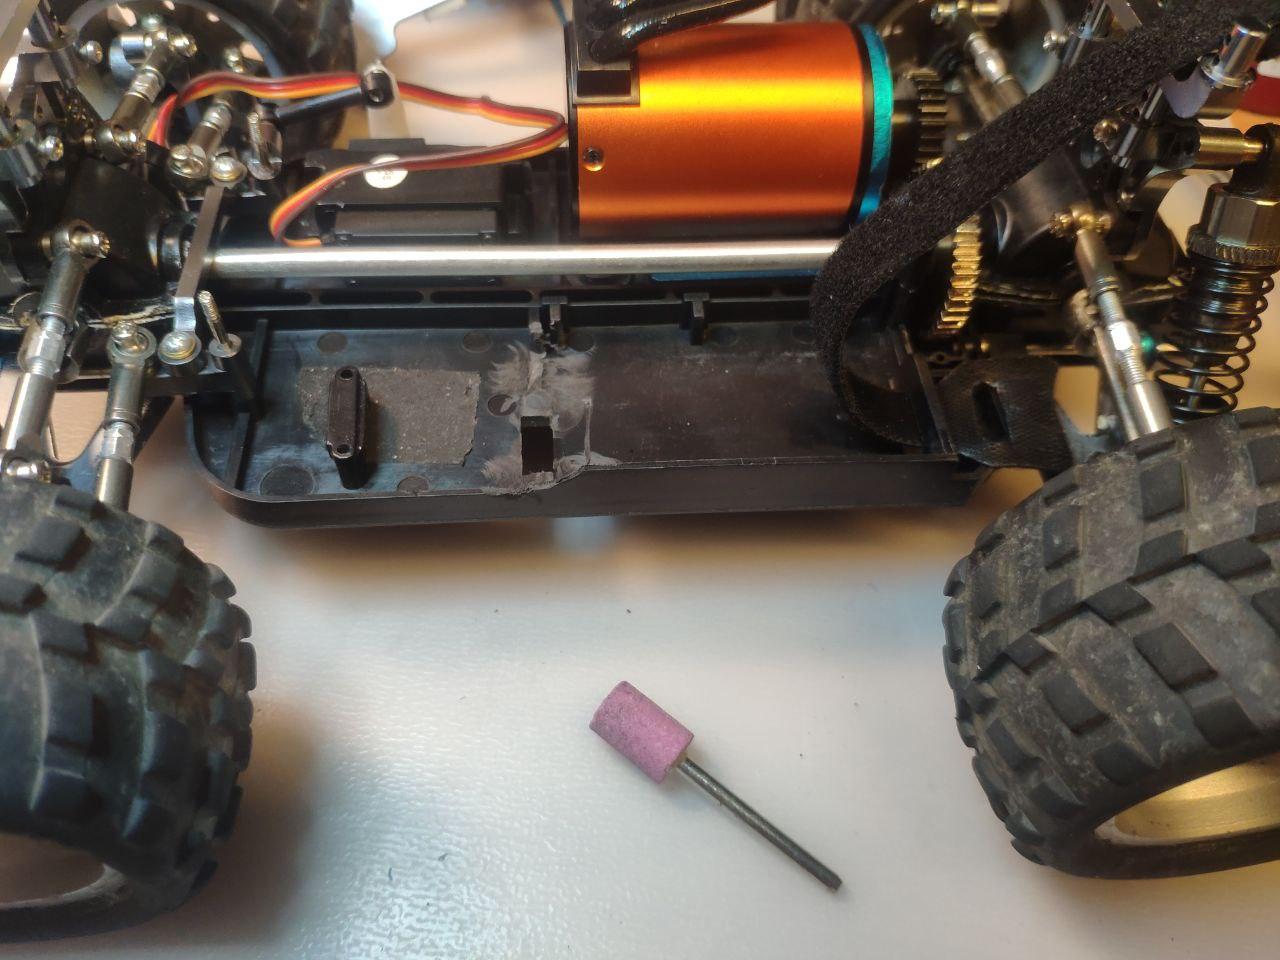
13) stock chassis mod for battery room (bigger 2s, or 3s)
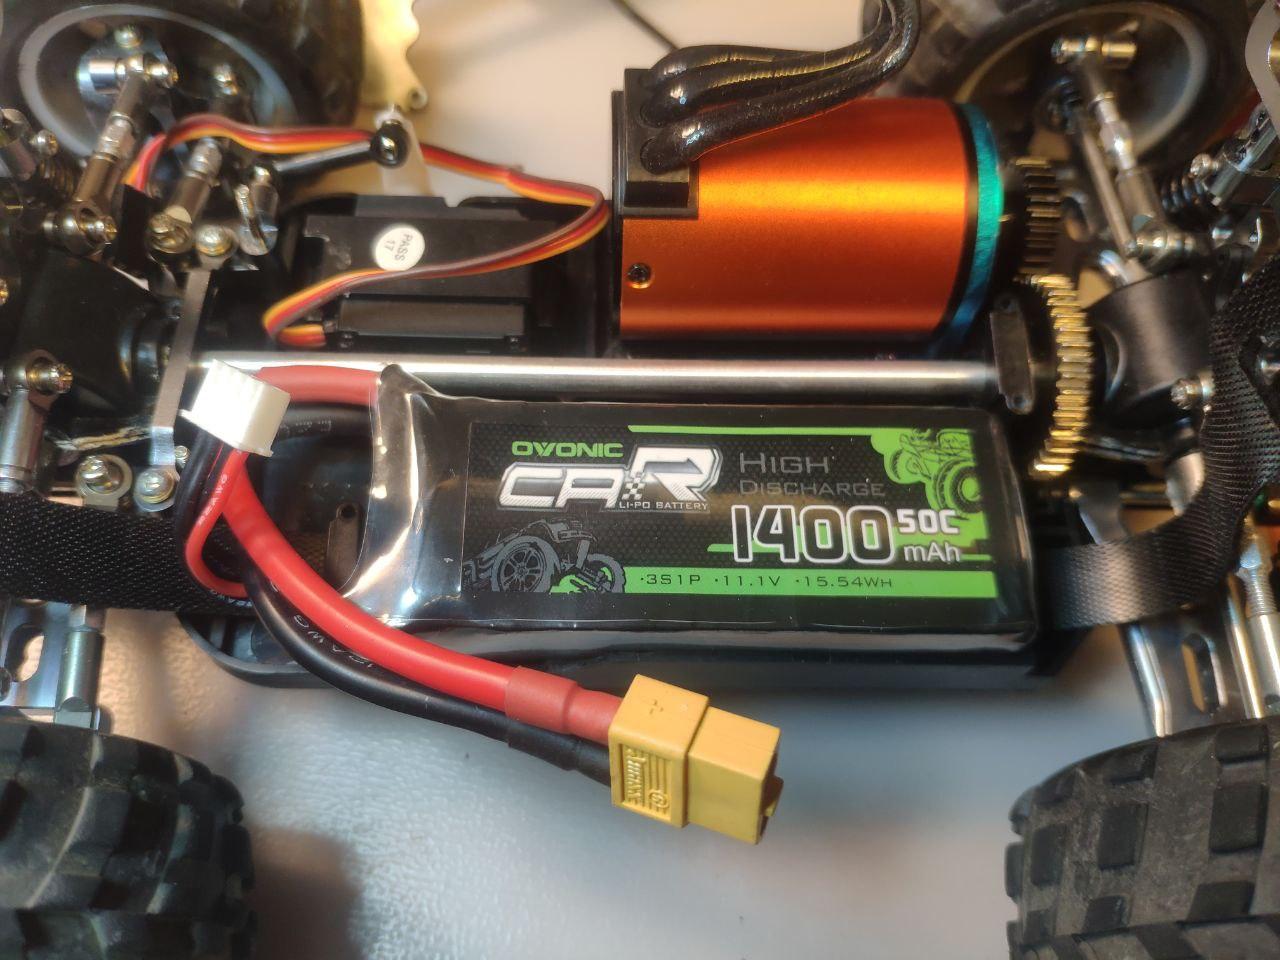
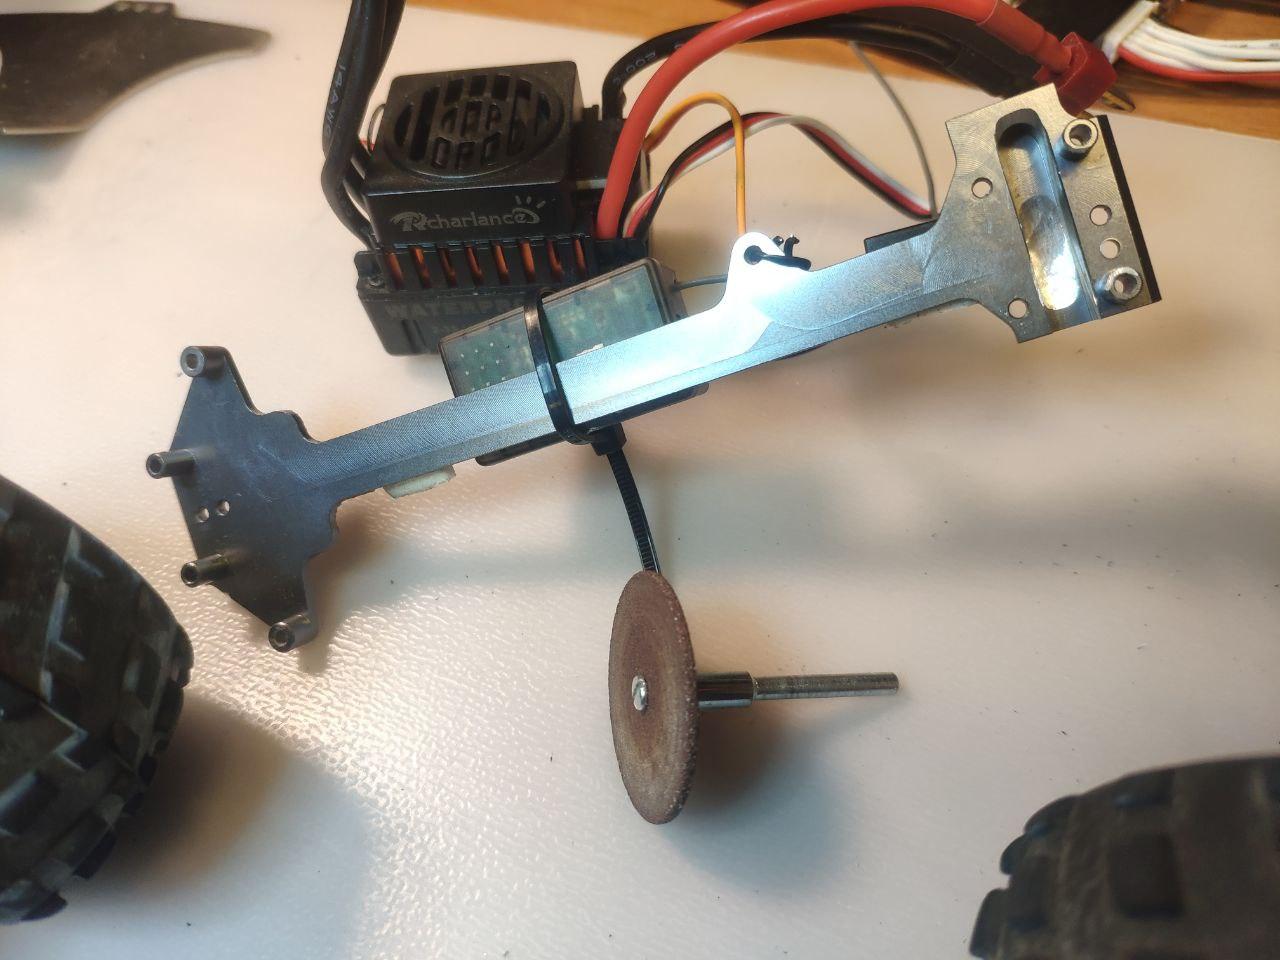
Once you remove the stock ESC you will find that an upgraded 35A ESC can fit almost anywhere, while the 60A must go in the middle, on the top front of the center deck, because it’s too big to fit elsewhere. The 45A is the only one that might fit in the stock ESC place, but I find there’s no reason to keep it there. I also find that an upgraded chassis is expensive compared to its advantages. So I decided to bring the only true advantage of an upgraded chassis (wider battery room) to my stock plastic one. Using Dremel and the tool in the picture below I removed most of the borders separating the ESC from the battery room. Note that I said most and not all because if you remove all the border and make the chassis plane you will compromise its stiffness. Leaving some 0,2-0,3 mm of the border won’t interfere with the battery positioning but will ensure that you don’t mess with the plastic chassis making it weaker. I then added a plastic piece in front to fit my biggest battery and keep the belt. I had to use a longer than stock belt, computer stuff.
14) better Lipo or even 3s (gentlements, start your engines!)
First of all, if you have a good charger, you can see on your own that stock 2s Lipos are actually pretty good. They at WLtoys knew very well the importance of the battery if you want to make a fast electric car, and this is for sure not the cheapest component of the whole product. With my Uruav M800 charger I was able to charge those Lipos and measure the current put in each, and then discharging them I found that I can fetch back almost 96% of the Amps. This is pretty good for stock batteries! About durability, in about one year I’ve lost 1 over 5 batteries. It was fully charged for about one week and it bloated so I had to discharge it last time and dispose it. But I still didn’t had my charger and I wasn’t able to storage-charge my lipos, so I won’t blame the cell’s quality for this accident. If you had different experiences please comment below at the end of the post. If you look for something more, regarding 2s I suggest you to look for high discharge rates and a known good brand: as 3s I bought an Ovonic 1400mAh 50C and I can’t do anything but praise it.
15) the center metal deck (let’s keep things stiff)
I picked the upper metal deck as last part of this upgrade path because when it comes to high RPMs you need something capable of keeping the whole model alltogeather, and the upper deck is it in the WLtoys A959B and A979B. This is a critical component to improve the torsional resistance of the chassis, and the stiffness of plastic differentials boxes and drive line supports. In my case I had to work on the metal gear housing with Dremel and the tool in the picture below because when screwed in place the upgraded 42T metal reduction gear was locked due to the metal deck. Anything you use to model its shape, remember those upgraded “metal” parts are really soft and should be handled with care to avoid permanent damages. Another thing regarding the upper metal deck is that old WLtoys had different screws for the steering line and they just needed a closed hole at the top. Newer WLtoys have a longer screw with nut and you will have to drill two 2mm holes to use newer screws with those upgraded metal decks.
Conclusions
At this stage, and depending on how above the decent you have gone with the motor/ESC pair, you might need more and more metal in order to barely keep the model on the ground when throttling. Your biggest problems might be: tyres ballooning, no backwheel, too much kick, metal differentials frying, plastic support for the main drive line melts, screws loosen even where you used threadlock. If you had even more/different troubles, please remember to drop me a comment down at the end of the post. On some of these things you can work, on some others you might just be over the limit of those cheap WLtoys RCs.
Please note that in the pictures of all cars you see other upgrades too, it’s because I didn’t bought all this stuff in the order I’m suggesting here. It’s been my mistakes, those that I want you to avoid.
If you like my jobs please click my links, they are at the end of each post, they are my only return for this work, I’m not sponsored by any shop and that’s your warranty that I’ll always be 100% unbiased.
I really wish you enjoyed the second of three posts: “Wltoys A959 A969 A979 A959B A979B upgrade path”. Read the first too if you didn’t! You’re welcome to comment below, I’ll reply asap!
In the next post I’ll discuss upgrade path 3, we’ll talk about going full metal & technical customizations.
Buy on Amazon the tools and products I used!
Dremel 3000: amazon.it amazon.co.uk amazon.de amazon.fr amazon.es
Bosch IXO 6th gen: amazon.it amazon.co.uk amazon.de amazon.fr amazon.es
Caliber: amazon.it amazon.co.uk amazon.de amazon.fr amazon.es
Third hand: amazon.it amazon.co.uk amazon.de amazon.fr amazon.es
Threadlock: amazon.it amazon.co.uk amazon.de amazon.fr amazon.es
Solid gear grease: amazon.it amazon.co.uk amazon.de amazon.fr amazon.es
Spray gear grease: amazon.it amazon.co.uk amazon.de amazon.fr amazon.es
If you use these links it helps this project grow and it’s 100% free of charge for you!!
Buy WLtoys cars on eBay:
A949
A959B
A969
A979B
If you are not yet a Banggood customer join through this link and get $20 bonus!
You will find any upgraded part showed above in their shop.
Love the content I’m seeing here so far. I can’t wait to see what project you’ll be doing next. Keep up the good work!!
I love to read you appreciation, it’s a great motivation to do more and better.
I’m currently working on some vids to show how WLtoys 1:18 works with upgrade path #1 and #2 complete. Then I will focus on A949, that I find very very funny. I also have in draft a “WLtoys A959/A979 so called upgrades” post and I will review soon two more cars, Sg1602 Pro and Amewi Sandstorm 22264. Stay tuned!
I think my upgrade path posts solve most of the questions for new users about A959B and A979B, please remember to share it with people that may like this content like you.
Beautiful content, thanks for sharing your knowledge!